Friday, November 18, 2011

Craftaholics Anonymous Craft Exchange #2

My second craft partner in the Craftaholics Anonymous Handmade Gift Exchange mentioned that she like peacocks.  I found a picture of a peacock that I thought would make a good embroidery pattern.  I decided to use it to make another zipper pouch.  I'm not the best embroiderer (?) but I like how it turned out. I hope she likes it.


I put a couple of pack of Jelly Belly candies because Fairfield, California is the home of the Jelly Belly Factory!  Isn't that what pen pals are supposed to do, send little keepsakes from their hometown?  :)

Craftaholics Anonymous Gift Exchange #1

I was first paired up with a fellow crafter in Delaware.  I didn't hear from her for a little while so I was given a new partner from Utah.  Crafter from Delaware wrote me back a day later, so now I have two craft exchange partners!  Lucky me!

The first gift I started on was from the Utah crafter.  She sent me a link to her blog and I saw that she had two cute kiddos about the same age as my kids.  I know my kids love to get mail, so I decided to include a gift for her children.   I made them each a rice filled owl.  My kids love to put these in the freezer on warm days and  pop them in the microwave for about a minute on cold days.  Or they just chuck them at each other.
 For my partner, I made a zipper pouch, and it's pretty large.  It measures about 8x10.  It was a little bigger than I imagined, but I figure you can put many things in it, like: a small notebook and pen, treats, paperback book, diaper and small pack of wipes.

I had a lot of fun with this craft exchange and I haven't even received my treats!

Tuesday, November 1, 2011

2012 Primary Theme - Choose the Right


I've created a printable that could be used in many different ways. Here are some ways I thought of:
  
  • Upload to a photo print shop, choose 4x6 or 5x7, and frame them.  
  • You could arrange them in a word document and take them to Kinko's to be printed on transparency to use in soap bottles or sanitizer bottles.  
  • Print it and mod podge to a piece of wood.
  • Use as a scripture bookmark.
  • Print them on cardstock and send them to the children as a post card.  Kids love getting mail.
  • Make stickers.
  • Shrink them and use them on a gift as a label.
  • Print it, laminate it, and add four little magnets to the corners for a refrigerator magnet.

To use, click on the the picture to make it larger and then right click and save it to your computer.  If that doesn't work, please let me know.

Friday, October 7, 2011

Homemade Postal Envelope

Out of envelopes.  That's okay, grab some cardstock and your sewing machine to make your own.

You could even use a paper grocery bag, news paper, cereal box...pretty much any paper!

Thursday, October 6, 2011

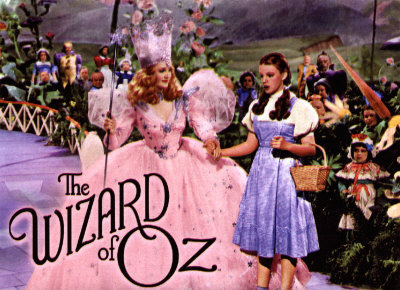
Dorothy - Halloween Costume


 How to make a Dorothy from the Wizard of Oz costume 
(in about the same amount of time it takes to watch the Wizard of Oz)

Supplies:
1 3/4 yards of Gingham fabric
About 20" of Velcro
(2) white buttons
ruler, rotary cutter
sewing machine

These measurements fit my small 4 year old.
  
Top chest piece: I measured her chest (20") plus 2.5" for seam allowances and 2" for overlap in the back.  I wanted the top piece to be about 5" tall.  So the measurements are (cut 2) 24.5" x 6".  I added a small strip to the top, the measurements are (cut 2) 2" x 6".

Skirt: Measure from waste to desired length (adding 1.5" for seam allowance) x width of fabric (my Gingham was 44").  I did 18", but it's a little long. You can always shorten it.

Straps: cut (4) 2" x 20"

I used a 1/4" seam allowance on the whole costume

Take the 2 small strip pieces and sew right sides together leaving a couple of inches open to turn right side out and press. Top stitch 1/8" around top and ends.

Take the 6" piece and sew with right sides together leaving a couple of inches open to turn right side out and press.  

Take small strip and pin, with the un-top stitched piece on top,  to top of 6" piece with right sides together.
Top stitch ends and top of 6" piece. Check the picture below.

Moving on to the skirt.  Fold in edges 1/4" and press, then fold again 1" and press.  Do the same for the bottom.


Sew around all three sides to close the hem.

Now we'll attach the skirt to the top. Sew basting stitch along the top, un-sewn edge.  Before gathering, find center of top piece and skirt, mark with a pin.
Gather skirt.  See picture below.
Pin right sides together and sew, but first make sure you've changed your sewing machine setting from the baste stitch.  Also, make sure your right sides together.  Before you sew, double check it.  I may have sewn it wrong.  Twice.
Top stitch, see picture below.


Time to attach the straps.

Straps: Take two and sew right sides together, leaving a couple of inches to turn. Press and top stitch.  Pin the dress together in the back, overlapping about an inch.  I tried it on my daughter at this point so I could make sure the straps were the right length; if they aren't, you can cut them down. (Pay no attention to the crazy faces) I wanted the straps to be at a little angle in front.  Find the middle of the dress and pin the straps about 2" apart. 


Turn to back and pin about 4" apart.

Sew the straps on making a 1" square.
Tada! Almost done.  To close the back, I used Velcro.  This is a costume, and I had Velcro on hand, so this is the way I have chosen.  My Velcro measured 19 1/2".  Pin in place and sew on.

Grab a white button up shirt, add the famous red shoes, and basket with Toto, and you are done. 

This is my first, and maybe only tutorial.  I'm almost embarrassed to post it.  I looked for a free tutorial and could not find one.  It's definitely not perfect, but this is a simple dress.  If you have questions, please email me.

Monday, October 3, 2011

Tabish Quiet Book Part 2

Here is part two of the Tabish Quiet Book.  
Write a letter. On this page is a place for a pencil and a small composition notebook.  The kids can write a letter and then on the next page, they can mail it! 


 Dress up!  On the left is an armoire.  Open the doors and you will find it filled with lots of felt clothing, and on the right are the two felt children waiting to be dressed.


 Ice Cream! This is one of my favorites.  Open the tub of ice cream and choose your flavors.
 Don't forget the toppings.


Check out my Quiet Book Part 1.
Check out Where I Party